Thursday, December 24, 2009
Christmas Trees Sugar Biscuits
My very first attempt at making sugar biscuits with royal icing! The icing's made with egg white. I'm bringing them to our potluck Christmas party today at Betsy's. I'll put up the photo of the Christmas Basket that I'll be putting together as a present for everyone.
Saturday, November 28, 2009
My First Loaf
My friends know that I am into cakes and cookies. The bread baker at home is really Moobe. This is my virgin attempt, using a recipe found in a blog called A Year in Bread. All in all, it took 4.5 hours (from the word go to the finished product) but it's well worth it. I could have left it for a little longer on the final proofing as it's not as light as I wished but nonetheless, it's nice. I halved the recipe, and used 5g of dry yeast with a couple spoons of warm water to get the yeast going. I'd use a little less yeast next time. Oh a little less salt will be good too.
I think I will mix in herbs the next time. Here's the ingredients that I used (approximately half of what the original recipe called for):
283g plain flour
14g sugar
5g dry yeast (mixed with 2 tbl sp warm water)
15g butter (melted)
454g milk (room temperature, though it called for warm milk in the recipe)
412g bread flour
for the method, do refer to the original blog post. The writer had step-by-step instructions, right down to the nitty gritty. Very useful indeed!
Monday, November 2, 2009
Eyeballs anyone?
Halloween potluck at Ayako's called for a 'scary but edible' dish. What's scarier than bloody eyeballs?
It's simply red jelly (we've put in cut-up strawberries) wrapped in a snowskin (see recipe from my mooncake) and then streaked with food colouring for effect. The 'pupil' is the snowskin mixed with a bit of cocoa powder. I'll probably make it in other shapes for other occassions haha!
Friday, October 30, 2009
New Thangka added
Sunday, October 18, 2009
One Pot Wonder
Saturday, October 3, 2009
Sunday, September 27, 2009
Snowskin Mooncake - Part 2
Ambitious me had wanted to make some cocoa snowskin mooncakes. Running short of lotus paste, I decided to shelf that as I don't know how it will go with the white lotus paste. Instead, we made the normal snowskin with white lotus paste filled with either Chinese chestnut or sunflower seeds. Used about 3 batches of the recipe that I put up last month to make 44 pieces of mini mooncakes. I'll use the Garfield mold the next time :) but first, I need to get more lotus paste.
Home Improvement - Ceiling lights
Whoa! It's been almost 2 months since I last updated here. Not much has been happening around the house (save for the usual father-son squabbles :P ).
Yesterday, Mr. Handyman decided to cover up the ceiling bulbs with a cute little lantern that we bought from Daiso. It makes the bulb less glaring, more comfortable to the eyes.
Sunday, August 30, 2009
Snowskin Mooncake
Our first attempt at making snowsking mooncake! Joint effort by yours truly and our king of the house - i make the dough, he does the assembling and the tough work of knocking the little thing out of the mould.
Simple list of ingredients:
Skin:
100g kueh flour
70g icing sugar
30g shortening
120g cold water
Filling:
Lotus paste
Melon seeds (optional)
Mix the melon seeds (if using) with the lotus paste. Divide the filling into small portions to fit into the skin and mould. Be careful not to over fill otherwise it will burst through the skin.
Assembling:
Roll out the skin, wrap the filling in, and put into floured mould. Press down tight to let the patterns form nicely. Knock out the mooncake. Chill before serving.
Have fun!
Simple list of ingredients:
Skin:
100g kueh flour
70g icing sugar
30g shortening
120g cold water
- Sieve flour and icing sugar together.
- Rub in shortening
- Gradually add in water till you get a soft dough
- Divide into portions to fit your mould
Filling:
Lotus paste
Melon seeds (optional)
Mix the melon seeds (if using) with the lotus paste. Divide the filling into small portions to fit into the skin and mould. Be careful not to over fill otherwise it will burst through the skin.
Assembling:
Roll out the skin, wrap the filling in, and put into floured mould. Press down tight to let the patterns form nicely. Knock out the mooncake. Chill before serving.
Have fun!
Tuesday, July 14, 2009
Home Improvement
Monday, July 13, 2009
Cream Puffs Chapter 2
Friday, July 10, 2009
Triple Chocolate Mousse
For those with a sweet tooth :P Didn't wait till the milk chocolate layer set properly and hence the white chocolate merged with the bottom milk chocolate haiz.. nevermind. It will be better the next time.
By the way, the recipe's from Anna Olsen. Don't have time to make the Dacquoise Crunch Garnish today. Will definitely make it the next time round.
Tuesday, June 16, 2009
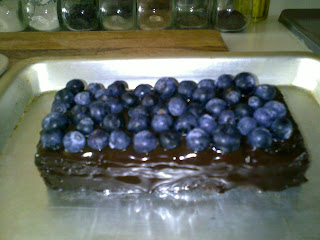
Chocolate Fudge Cake
Wednesday, June 3, 2009
puff
Thursday, May 14, 2009
breadsticks
Monday, May 11, 2009
Japanese style cheese cake
Tried my hand at baking cheese cake yesterday (I normally do the easy non-bake ones). It's not the heavy American / New York type but the light, fluffy Japanese Cheese Cake that saw queues snaking outside the shops when it was first introduced here. The recipe was simple but the baking time was long. I can't remember where I got the recipe from. If I recall, I will put the credit up here but meanwhile, here's what I used (being just an experiment, I used only half the ingredients and used a loaf pan instead of the round pan):
A.
250g cream cheese
100ml fresh milk
50g butter
B.
140g sugar
6 egg whites
1/4 tsp cream of tartar
C.
60g cake / superfine flour
20g corn flour
1/4 tsp salt
6 egg yolks
1/4 tsp lemon juice
6 egg yolks
How to:
1. Preheat oven to 160 deg C, lightly grease 8" round pan & line with parchment / greaseproof baking paper.
2. Melt A in a bain marie (or a double boiler) and let the mixture cool off
3. Whisk the egg whites and cream of tartar in B till foamy, add in sugar the sugar and whisk till soft peaks form. Cover and put in the fridge while you prepare the rest of the cake.
4. Fold C into A (prepared in Step 1) then gently combine the whisked egg whites in Step 2 with this mixture.
5. Pour into cake pan and bake for 1hr 10 mins in a water bath.
6. Let cake cool before removing from pan. This cake is best eaten chilled.
The texture of the cake is light, somewhat close to the store-bought type but Moobe feels it needs a bit more cheese though. I'll find out what Joy and Lai Leng think tonight :P
Happy baking!
Thursday, April 16, 2009
Cheesy Munchies
For all the cheese lovers...
Went into Nigella Lawson's website and found a recipe for Cheesy Feet. I don't have cookie cutters in the shape of a foot so Yohei used bear, elephant and rhino instead.
Verdict? A tad too cheesy for some but it's great with beer!
Went into Nigella Lawson's website and found a recipe for Cheesy Feet. I don't have cookie cutters in the shape of a foot so Yohei used bear, elephant and rhino instead.
Verdict? A tad too cheesy for some but it's great with beer!
Tuesday, April 7, 2009
Dinner - Home-made Spinach Noodle
Yes! I finally got hold of the pasta maker from my sister (mom's machine is lost somewhere in her sea of unlabelled boxes haiz) and we are making spinach noodle (Yohei calls it "green noodle") for dinner. Here's the first installation (the making process...)
You've gotta wait till after 8pm for this to continue :)
2nd installation is in!
You've gotta wait till after 8pm for this to continue :)
2nd installation is in!
The noodles boiling happily in the pot
yummmmmm....
It's really easy to make the noodles. I used 200g flour with 1 egg and strained liquid from a couple bunches of spinach, mixed them up, gave them a good knead and let the dough rest till we were ready to get dinner going.
The pasta maker came in really handy and made the rest of the process a breeze. All I had to do was to roll the dough out thin and then cut into ribbons. In the ribbons go into a pot of boiling water, while Moobe gets the pan going with the simple tomato base (yes, again... it's Yohei's current favourite) with minced pork and mushrooms (with lots of garlic, onions and carrots).
I'll probably try using carrots for the pasta the next time if my King gives me the nod *rolls eyes*
Monday, April 6, 2009
Lunch - Home-made Pasta
Holy Molly! I made my own pasta for lunch today!
Yohei has his in little flower shapes which he helped cut out with a little cookie cutter.
Moobe and I had ours cut into long strips. The pasta is made according to Jami Oliver's recipe in "Jamie's Kitchen" - for 6 people, 600g Tippo (ok I used normal flour because I don't have Tippo) flour to 6 eggs. I made 200g today, enough for 2 adults and Yohei.
I kneaded the dough at about 10am and left it to rest, covered, till we were ready to cook lunch at about 12ish. Terribly hard work rolling out the dough so I'm definitely going to see if I can take over my Mom's pasta maker :P
The sauce is a simple one of minced pork in tomato sauce base with loads of garlic, celery and chopped tomato. Us adults had added Cayene pepper for some kick.
I really like the texture of the pasta and it's really easy to make (ok except for the rolling part).
Tomorrow, we shall try spinach noodles...
Sunday, April 5, 2009
Lunch - Cold Cha Soba
Today's lunch is cold Cha Soba, boiled eggs and Moobe's version of Cha Siu (roasted pork). Sorry, no recipe haha! But I'm pleasantly surprised on the food cost. $2 for the Cha Soba from Daiso, 2 eggs @ 30 cents, pork about $3 (there's another smaller helping in the kitchen not shown). In all, I'd safely say our lunch cost below $8. Ok that excludes Moobe's labour :P !
Saturday, April 4, 2009
Rich Chocolate Brownie Bars
I baked brownies this morning and cut them up into little bars. Here's what I used:
60g Unsalted butter
150g Dark chocolate (I used Cadbury Gold 70% cocoa)
150g sugar
75g Self-raising flour
1/2 tsp Vanilla extract
5g salt
2 eggs
75g chopped walnuts / Hersheys chocolate chips (optional)
1. Preheat oven to 180deg C and grease your baking pan (if required)
2. Melt butter and chocolate
3. Put together dry ingredients (flour, sugar, salt) and mix them up with your spoon
4. Whisk eggs with vanilla
5. Pour egg mixture into dry ingredients, add in the melted butter/chocolate. stir and mix.
6. Put in the optional ingredients and give it a light mix
7. Pour into baking dish and put in oven. Bake for 15 - 20 minutes (depending on the size of your pan). Check for doneness (tooth pick should come out clean from the middle of the pan)
8. Let cool completely on a wire rack and cut into bars
You can chill or freeze the uneaten bars and warm them up when required. Best served with a scoop of vanilla ice cream :)
Tuesday, March 17, 2009
Subscribe to:
Posts (Atom)